
If, like me, you love good food as much as you love backpacking and wild camping, the camp kitchen can be a dangerous place to overpack. It only takes a couple of extra pots, a “just in case” plate, and a bag of heavy ingredients to turn a fun overnighter into a slow, shoulder‑aching slog. Here’s an ultralight backpacking kitchen kit list to get you started on the essentials, plus two checklists: (1) the minimal setup and (2) my personal setup, which includes a few grams of extra luxuries to keep things semi-gourmet. This is learned from years of trial and experience, going from overpacking to a lighter setup. My homemade dehydrated backpacking meals help me keep it semi-gourmet, so I’ve also included those luxury extra grams I pack to enhance the outdoor dining experience!
FYI: There are some affiliate links in this post, so if you purchase something after clicking on a link, I may make a small commission. This helps to support the running of this website, so thanks!
My Ultralight #KitchenGoals


The true meaning of “ultralight” is purely subjective. Some take it as far as not packing a stove at all. I’m not that much of a purist. For me, an ultralight backpacking kitchen is:
- Simple to use when I’m tired (and possibly wet and cold!).
- Light and compact, with everything nesting together in (or around) one pot
- Focused on one‑pot or boil‑only cooking to keep things quick and faff‑free.
- Easy to clean with very little water and minimal mess.
- Reliable in wind, rain, and general Scottish nonsense.
- Regularly edited: if something doesn’t earn its place on multiple trips, it doesn’t stay in my lightweight camping kitchen.

Ultralight Backpacking Kitchen: Essential Kit List
A good ultralight backpacking kitchen is compact but complete enough that you can cook, eat, caffeinate in you wish, and clean up without drama. Think of this as the practical backbone of your lightweight camping kitchen, before we get into the “nice‑to‑have but not strictly necessary” toys.
Stove and fuel


Your stove choice is where weight, convenience, and cooking style all collide. It’s also where you can fall down a serious rabbit hole of “best stoves for backpacking” gear porn.
- Jetboil Flash – A good all‑in‑one system if you mostly boil water for coffee and dehydrated meals and want something fast and idiot‑proof. It has a built-in piezo igniter that has actually not failed me yet in the years I’ve owned it (though I always carry a backup lighter). Learn more: Jetboil Flash
- Jetboil Minimo – I bought one of these after my Jetboil broke (user error) – the same stove works on both the Minimo and the Flash so I thought, why not? The bowl is squatter and wider than the Flash, making for more pleasant out-of-the-bowl eating. However it doesn’t fit the Jetboil coffee press, so I still find myself using the Flash quite regularly. Learn more: Jetboil Minimo
- MSR Pocket Rocket – Small, affordable, super functional, and lighter than the Jetboil; this is what I used for years before I got a Jetboil. It packs tiny and is a classic in many “best backpacking stoves” line‑ups. Learn more: MSR Pocket Rocket
Other
A major trade-off to think about is fuel efficiency. In my tests, the Jetboil Minimo was the most fuel efficient, boiling 250ml of water in about 60 seconds. The Jetboil Flash was pretty good at 70 seconds. But the Pocket Rocket took a whopping 90 seconds. So for short, fast, super light expeditions, the Pocket Rocket could be ideal, but for longer trips where fuel efficiency is important, the heavier Jetboil could be where it’s at.
Both of these run on twist‑on butane/isobutane/propane canisters, which are widely available across the UK and USA. If you’re travelling internationally, you might want to consider a stove that runs on liquid fuel. I’m no expert on these stoves because I’ve never used one in my life, so I recommend reading REI’s guide on backpacking stoves for the full down low on different stove options and what’s best for your use case.


Pot, mug, and / Or bowl

How minimalist you go here depends on how much you like hot drinks and how fussy you are about plating (or should that be “bowling”?) your dinner. I tend to prefer double-walled titanium, which is lightweight, retains heat, won’t scald your hands. A more budget-friendly option is collapsible silicon bowls (e.g. Sea to Summit’s Frontier Ultralight Collapsible Dinnerware Set 197g/7oz) but for me, they aren’t very pleasant to eat / drink from.
- Pot – If you’re using a Jetboil or similar integrated system, you won’t need a separate pot at all. Otherwise, go for an ultralight titanium pot or kettle like the TOAKS Titanium 750 ml Pot or the 900ml MSR Titan Kettle. There are smaller sizes, but the 750ml will let you comfortably fit your stove and extras in the pot, and provide enough space if you want to go beyond just boiling water and cook food in your pot.
- Mugs – Not necessary if you’re not into drinking tea or coffee but for me these are backpacking essentials.
- Snow Peak Titanium Double Wall 450 ml Mug – my current mug, pricy, but light, pleasant to hold, and keeps my camp coffee for longer.
- GSI Outdoors 17 oz Infinity Backpacker Mug – I used this for years and still have an affinity for it. It’s a slightly heavier mug but very practical and budget‑friendly option. It’s also a decent size, big enough for a cup-a-soup.
- Bowl – Not strictly necessary if you’re happy eating out of the pot, but a bowl can feel more civilised after a long day. I have a double-wall titanium bowls from Snow Peak (the pricy option) and Boundless Voyage. The double wall is nice because the bowl doesn’t get burning hot when you add food to it, while also keeping the food hot for longer. Cheaper options are lightweight stainless steel bowls or silicon collapsing bowls but the eating experience is not nearly as nice!
If you’re really shaving grams, you can absolutely run an ultralight backpacking kitchen with just a pot and a mug. But if a bowl makes your evenings feel more like “dinner” and less like “functional refuelling”, it might be weight worth carrying.
Utensils

- Snow Peak Titanium Spork – a classic ultralight staple: tough, light, and happy to shovel in everything from porridge to pasta.
- Light My Fire Titanium Fork Spoon Knife Combo – a more “multi‑tool” option if you like having a defined cutting edge and separate tines.
I usually bring one main utensil and a tiny backup spoon buried in my food bag, because eating with a tent peg is only funny once.
Fire and ignition
Stoves are basically fancy paperweights if you can’t light them, so this is one place where redundancy is smart in any lightweight camping kitchen.
- Waterproof / Windproof Torch Lighter as the primary ignition, especially handy in Scottish weather
- Flint and Steel as a robust backup that still works when things get damp
- A small BIC lighter tucked away “just in case” – because redundancy is the ultralight way of admitting things get lost
You don’t need to carry a full fire‑lighting shop, but having at least two reliable options makes your ultralight backpacking kitchen much less stressful in bad conditions.
Fuel
Fuel choice will depend on your stove, but for most ultralight setups, standard gas canisters are ideal.
The Jetboil Flash and MSR Pocket Rocket both work with twist‑on butane / isobutane / propane canisters. Choose your canister size based on trip length, how many hot drinks you like, and how much you enjoy watching water boil “just because”.
Hydration and water treatment
Your lightweight camping kitchen is only as useful as your water supply.
- Hydration
- 2–3 L Hydration Pack so you can sip on the move without stopping
- Nalgene bottle, which also doubles as a hot water bottle for cold nights and can be used to cold‑soak dehydrated meals or overnight oats
- Water treatment
- A compact water filter such as a LifeStraw
- Water purification tablets, which I rarely need here in Scotland but can be a lifesaver in other parts of the world
In wetter climates you can often carry less water and treat more as you go, but always plan conservatively; nothing derails a carefully dialled trip quite like running out of water halfway through dinner.
Cleaning and waste
A tiny cleaning kit keeps your lightweight camping kitchen functional and helps you leave the hills as you found them.
- Biodegradable Soap in a tiny dropper bottle
- Cleaning Cloth or a small sponge scrap for wiping pots and mugs
- Waste bags – a simple plastic bag or a reusable hiking trash can for food wrappers and micro‑rubbish
Strain out food scraps, scatter grey water well away from streams, and pack everything out. Always remember to Leave No Trace!
Optional Extras: Ultralight Camp Kitchen Luxuries
Once you have the basics covered, there are a few “bonus” items that can make your ultralight backpacking kitchen feel more like a tiny home kitchen – as long as you’re happy to carry them.
Skillet and “real cooking”
If you’re mostly boiling water and pouring it into bags, a skillet is overkill. If you dream of pancakes, fried halloumi, or actual fry‑ups in the hills, it suddenly feels essential.
- Jetboil Summit Skillet – A genuinely usable non‑stick skillet that pairs nicely with Jetboil systems and other small stoves.
I don’t carry this on fast‑and‑light missions, but for shorter trips with more “camp time”, it can turn your lightweight camping kitchen into an actual kitchen.
Coffee kit for the trail


Is coffee “worth the weight”? Only you can answer that. For me, the answer is usually yes.
- Jetboil French Press – Turns your Jetboil into a proper coffee maker
- GSI Java Drop Pour Over Coffee Maker – A neat little pour‑over option that works with a standard mug
- V60 + Filters – Bulky but inexpensive and lightweight; for me this makes the tastiest coffee (the one cup V60 also nests into the MSR Titan kettle!)
If you’re a serious coffee person, these are tiny upgrades that can make your morning feel about 50% more joyful. Learn more ways to make coffee in the wild.

Spices, sauces, and flavour boosters
A tiny spice kit can transform otherwise plain meals and gives your ultralight backpacking kitchen a lot more range for very little weight.
- STAX Leakproof Stackable Containers – Brilliant for salt, chilli flakes, garlic powder, herbs, or your favourite spice blends
- DIY options like old film canisters if you have those knocking around
I usually carry a few high‑impact bits: salt, chilli, maybe smoked paprika or curry powder depending on what I’ve packed.
Hot food flask and heat retention
A hot food flask is firmly in the “luxury item” category, but it does earn its place in certain situations.
- Thermos‑style food flask: something like the Thermos King Food Flask works well for keeping soups, stews, or pasta hot for hours
A hot food flask is great for winter days, long cold hikes where you want a hot lunch without proper cooking, or trips with kids. It’s not part of my everyday ultralight backpacking kitchen, but when it comes, it works hard.
How To Personalize Your Ultralight Backpacking Kitchen
Not every trip needs the exact same kitchen. A big part of going ultralight is knowing what you can leave behind.
Group Size
If you’re travelling with other people and plan to share in the cooking, you can save weight by divvying up the gear amongst you. This also affords some extra grams if you want to add some of those luxury foodie extras to your group camp.
Trip length and style
- Weekend overnighter – You can get away with very minimal gear: small stove, one pot, one utensil, simple meals
- Week‑long or longer – Reliability and repairability matter more; you might carry an extra lighter, more robust containers, and more varied food
- Solo vs group – Solo is simpler; group trips might justify a bigger pot, extra mug, and more cooking options
Climate, season, and location
- Wet/cold climates favour hot drinks and cooked meals, so your stove and fuel become more important
- Very dry areas or where there are fire bans might push you towards gas‑only cooking or even cold‑soak, depending on your comfort level
- In some locations, carrying extra water capacity for cooking is more crucial than shaving a few grams off your spork
Personal preferences and diet
- Coffee vs no coffee
- Fully dehydrated meals vs mixing in fresh food
- Vegetarian, vegan, gluten‑free, or other dietary needs that might change what your ultralight backpacking kitchen has to do for you
This is where your own preferences matter more than anybody’s gear list on the internet (including mine).
Minimalist Ultralight Kitchen Checklist

Designed for solo trips, boil‑only cooking, and people who actually stick to the “ultralight” in ultralight backpacking kitchen.
| Gear type | What you need (general) | My recommended product | Weight (g) | Weight (oz) |
|---|---|---|---|---|
| Stove | Tiny canister stove | MSR Pocket Rocket 2 | 73 | 2.6 |
| Pot | 700–800 ml titanium pot/kettle | TOAKS Titanium 750 ml Pot | 86 | 3 |
| Wind shield | Folding wind shield or make one out of tinfoil | Folding windscreen | 28 | .99 |
| Utensil | Single lightweight spoon or spork | Snow Peak Titanium Spork | 16 | 0.6 |
| Fire / ignition | Main lighter plus a backup | Mini BIC Lighter | 12 | .42 |
| Hydration (bottle or bladder) | Collapsible/soft bottles tend to be the lightest | Platypus Collapsible Water Bottle | 34 | 1.3 |
| Water treatment (optional) | Filter + chemical backup | LifeStraw + water purification tablets | 56 | 2 |
| Cleaning | Tiny soap bottle + mini cloth/sponge | Biodegradable soap + cleaning cloth | 27 | 1.0 |
| Waste | Light rubbish bag or dedicated trash pouch | Lightweight trash bag or reusable hiking trash can | 8 | 0.3 |
Approximate total for this minimalist kitchen (not including fuel or food): about 340 g / 12 oz.
Maximalist Luxury Ultralight Kitchen Checklist
| Gear type | What you need (general) | My recommended product | Weight (g) | Weight (oz) |
|---|---|---|---|---|
| Stove system | Integrated fast‑boil system | Jetboil Flash | 371 | 13.1 |
| Mug | Insulated mug for hot drinks | Snow Peak Ti Double Wall 450 ml Mug | 108 | 3.8 |
| Bowl | Small lightweight bowl | Boundless Voyage 420 ml Ti Bowl | 131 | 4.6 |
| Utensils | Main spork + long‑handled spoon/spork | Snow Peak Ti Spork + Long Handled Spork | 36 | 1.3 |
| Fire / ignition | Weatherproof lighter + backups | Torch lighter, Flint and Steel, mini BIC | 86 | 3.0 |
| Hydration (on‑the‑move) | 2–3 L hydration bladder | 2–3 L hydration bladder (2 L typical) | 170 | 6.0 |
| Hydration (bottle) | I like a hydration pack + Nalgene | Nalgene 1 L bottle | 177 | 6.3 |
| Water treatment | Filter + tablets | LifeStraw + water purification tablets | 67 | 2.4 |
| Cleaning | Soap + cloth | Biodegradable soap + cleaning cloth | 27 | 1.0 |
| Waste | Dedicated trash bag/container | Reusable hiking trash can | 20 | 0.7 |
| Coffee kit | Brew method that suits your coffee habit | Jetboil French Press or GSI Java Drop | 49 | 1.7 |
| Spices & condiments | Tiny containers for spices, oil, etc. | STAX Containers + Squeezy Bottle | 65 | 2.3 |
| Prep tools | Small cutting surface + food knife | GSI Ultralight Cutting Board + Folding knife | 90 | 3.2 |
Approximate total for this comfort‑forward kitchen (not including fuel or food): around 1,684 g / 59.4 oz – still carryable, but maybe don’t also pack half of ultralightoutdoorgear.com.
Bonus Kit List Item You Can Keep At Home
The lightest part of my backpacking kitchen actually starts at home. For turning home cooking into trail‑ready food, I use a Food Dehydrator. It’s my gourmet camping workhorse – brilliant for big batches of stews, sauces, and soups that end up in my ultralight backpacking kitchen.
If you want to go deeper into recipes and ideas, have a look at my guide to homemade dehydrated backpacking meals or grab my free eBook:
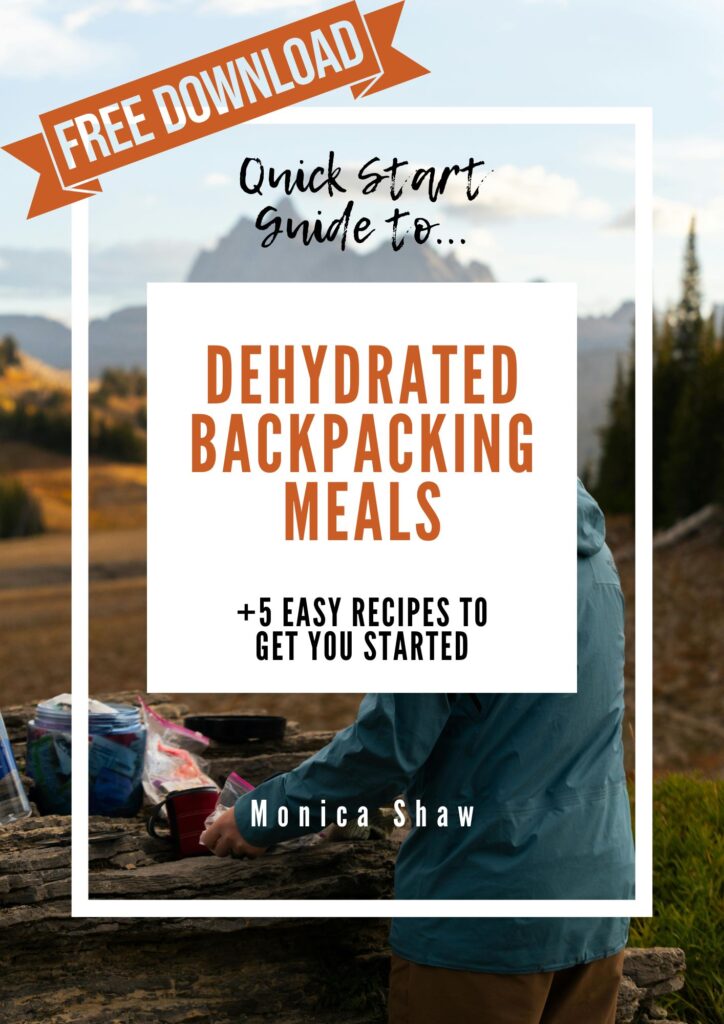
Get the FREE Quick Guide to Dehydrated Meals
Download my free practical and delicious approach to homemade dehydrated meals + 5 easy adaptable recipes to get you started. Enter your email below and I’ll send you a link to download the 20-page PDF.
By subscribing, you agree to recieve occasional emails from me. Don’t worry, you can unsubscribe any time!
.
Ultralight backpacking kitchen FAQs
What is a good weight for an ultralight backpacking kitchen?
As a rough guide, many people aim for 300–700 g for a complete ultralight backpacking kitchen (stove, pot, mug, utensil, lighter, basic cleaning kit). Add hydration and water treatment on top. If you’re significantly above that, there’s usually an easy win somewhere.
Do I really need a stove, or can I go stoveless?
You can absolutely go stoveless and live quite happily on cold‑soak meals, wraps, nuts, and snacks. It’s the ultimate in lightweight camping kitchen minimalism. That said, in cold, wet conditions, a hot drink or dinner is a big morale boost. I tend to keep a stove in the mix for that reason alone. But if you’re curious about going stoveless, checkout Backpacking Foodie’s Cold Soaking Guide for Backpackers.
Is a Jetboil considered ultralight?
A Jetboil isn’t the absolute lightest option out there, but it is very efficient and simple. If your priority is fast, easy hot water with minimal faff, the Jetboil Flash is a solid choice. If you want the lightest possible setup and don’t mind a bit more tinkering, a tiny canister stove and titanium pot will usually win on grams.
Can I just eat from the pot instead of packing a bowl?
Yes. Eating from the pot is the classic ultralight move. A bowl is purely comfort and civility. If you don’t mind your dinner being a bit “utilitarian”, skip it. If you enjoy that tiny ritual of eating from a proper bowl, bring the lightest one you’re happy with.
How many litres of water capacity do I need for cooking?
For most backpackers, 2–3 L of total water capacity works well: enough for drinking, plus cooking and a bit of cleaning. In dry areas or on long waterless stretches, you may want more. In very wet places with frequent streams, you can carry less as long as you have reliable treatment options.
Next Steps
If you’d like help planning what to eat with this setup, check out:
- Homemade dehydrated backpacking meals
- Wild camping food – what to eat on a wild camping trip
- Wild camping checklist – customisable & downloadable
And if you want a big batch of tried‑and‑tested recipes and dehydrating tips in one place, my ebook is for you:

Tired of Sad Expensive Packet Meals on the trail?
Fuel Your Adventures with Real Food
Turn your favourite home dinners into light, packable, actually-delicious backpacking meals. Learn exactly how to dehydrate, store, and rehydrate hearty plant-based recipes so they taste great at camp and don’t weigh you down. Perfect if you want real nutrition, less plastic packaging, and dinners you’ll look forward to all day. This bargain £4.99 eBook includes no nonsense tips for home dehydration, plus 20 adaptable world-inspired plant-based dinners to get you started.
 African Sweet Potato and Peanut Soup [Dehydrated Meal Recipe]
Leave a Reply