
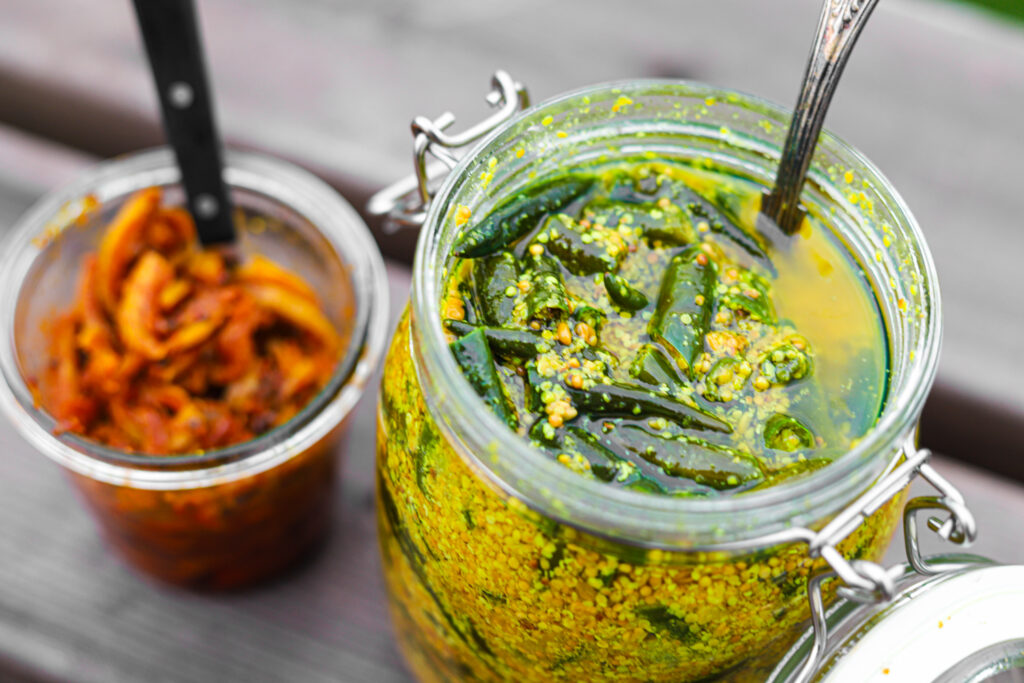
It was Mark’s obsession with chillies and his quest to preserve their unique flavours that led us to discovering this chilli pickle (“mirch ka achar” in Hindi). It’s since been a staple in our kitchen and a star item in our honesty box. I’m not exaggerating when I say it’s an absolute banger of a pickle, now firmly planted in the same league as our beloved salsa macha and Chicago-style hot giardiniera. You know a condiment has made it when it lives permanently on your kitchen table!
FYI: This post contains affiliate links. If you make a purchase through one of my links, I might earn a small commission. Thanks for supporting the journey!
Quick primer on Indian pickles
A quick note on Indian pickles, because achar (literally meaning “pickle”) is a whole universe unto itself. Pickling and preserving in India goes back thousands of years, born out of necessity in blisteringly hot climates where seasonal produce needed to be stored safely for the months ahead. But over time, pickles evolved from purely practical to deeply cultural — lovingly made at home, passed down through families, and served as essential flavour boosters alongside everyday meals.
Unlike Western pickles, which often lean acidic and vinegary, or even sweet, Indian pickles are intensely aromatic, salty, spicy, and tangy, thanks to a powerful trinity of oil, spices, and sunlight*. The magic isn’t just preservation — it’s transformation. A spoonful of achar is meant to cut through richness, wake up simple foods, and add a sharp, complex punch that brings a plate together. It’s why you’ll find pickles served with dal, rice, rotis, fried snacks, yoghurt, and pretty much anything.

Chilli pickle highlights
This chilli pickle is surprisingly straightforward to make. The original recipe by Avi Ranen uses bird’s eye chillies. I’ve adapted it to use rocket chillies (conveniently available at my local Tesco). Any long, finger-type chilli will work. The rocket chillies are milder than birds eye, which I think works in our favour because it means we can devour this pickle in even greater quantities without setting our mouths on fire. I’ve also scaled Avi’s recipe down to a quantity more sensible for the home kitchen (this will make about 1/2 liter of chilli pickle).
Note, you’ll need to age this pickle for at least a couple weeks or more to see it to its prime.
We’ve found countless ways to enjoy this vibrant condiment, but our go-to pairing is with red lentil dal, fresh roti, and whatever vegetables we have on hand. And always some yoghurt or raita on the side to tame the heat. Consequentially, it’s also delicious with cheese and hummus!
Oh yeah – this pickle involves 7 juiced lemons. You can use the leftover lemon rinds to make lemon pickle – a must do if you’re already a fan of lime pickle!
* You’ll find many recipes for Indian pickle say they should be left to age in the sun. We don’t get much sun here in NW Scotland, and I haven’t found this step necessary. I did try the technique during one bright summer spell and actually found that the sun caused the vibrant green of the chillies to fade, leading to a dull but delicious result. Still, less aesthetically pleasing for me, so I haven’t done this again.

Chilli Pickle (Mirch Ka Achar)
Ingredients
Method
- Prepare the Chillies: Slice the chillies into small 1cm rounds, discarding the stems (you'll end up with about 400g or so of sliced chillies). You may want to wear gloves for this part, though I don't bother.
- Toast and Grind the Seeds: Lightly toast the mustard seeds and fenugreek seeds in a hot dry pan until they become fragrant – this should only take a couple of minutes. Let them cool then transfer them to a pestle and mortar and grind to a coarse powder (still leave some whole spices around). Mix this aromatic spice blend with your sliced chillies in a large bowl.
- Add Salt and Lemon: Add the salt and lemon juice to the chilli mixture and mix everything together thoroughly. The salt will help preserve the pickle, while the lemon juice adds that essential tangy brightness.
- Prepare the Spiced Oil: Heat the sunflower oil in a pan, then stir in the asafoetida and turmeric powder. Immediately turn off the heat – you just want to bloom the spices, not cook them. Leave the oil to cool completely before adding it to the chilli mixture.
- Jar and Wait: Pack the chilli mixture into a sterilised 2-litre jar. Now comes the hard part – you'll need to leave it for at least a month before digging in. This waiting period allows all the flavours to meld together.
Recipe inspired by Avi Ranen’s Green Chilli Pickle on Great British Chefs.

 Veggie Paella – Dehydrated Backpacking Meal
500kg of chilli seems slightly excessive…. 😉
Can you have too many chillies? 😉 This recipe does make a large quanity, but you can always scale it down. That said, it improves with age so I find it worth making a big batch. Enjoy!
Oh absolutely agree! I did actually mean the *kilogram* part – presumably a typo, because half a ton (500 kilograms rather than grams, as the recipe says) of chillies probably is slightly pushing it! 😉
It’s 1 month since I made my first batch of this pickle – not sure I can wait any longer! I will report back once taste testing has commenced;) Hopefully the heat keeps me from devouring it… I used rocket chillies instead of birds eye – same heat but more sweet – so will be interesting!
Oh, haha! Now I see! Thanks for making me aware of that typo. It’s fixed now. I usually can’t wait the full month to try it! I’m making another batch today, also using rocket chillies. I look forward to hearing what you think!
How long will this pickle store in sterilised jars? I have a great crop of chillies in my poly tunnel this year
These will keep for months…six months at least or longer. Just make sure that the chillies are covered with oil. Let me know if you make them!
Hi Monica,
Made it last night, now waiting the suggested month before I try. I was a bit concerned that 175g of sea salt was a lot for 500g of chillies but followed your recipe in total except put the mixture into 4 smaller jars. I have an abundance of cayenne chillies in my poly tunnel, can you use this recipe for the chillies that have ripened and turned red? Thank you.
Pete
Hi Pete! You must let me know how it turns out. TBH, we have recently not been able to resist tasting it for a whole month, so it’s worth trying now and seeing how it evolves (I must update the post to that effect!). I think it would work fine with red chillies. I’m jealous of your glut! (Mine are growing at a snail’s pace in our own poly tunnel up north in Scotland). Let me know how it all goes!